Resource Packs in Singleplayer & Realm
You can use your own custom texture packs in your singleplayer worlds and on Realms — not just on servers! This takes a few extra steps because of how consoles handle resource packs.
Right now this method does not work for Singleplayer or Realms. Minecraft has removed all free texture packs from the Marketplace, so the required "Minecraft Classic Texture Pack" can no longer be downloaded.
Until Mojang adds a free pack back to the Marketplace, there is no way to use custom packs in Singleplayer or on Realms. The steps below will work again once a free pack is available.
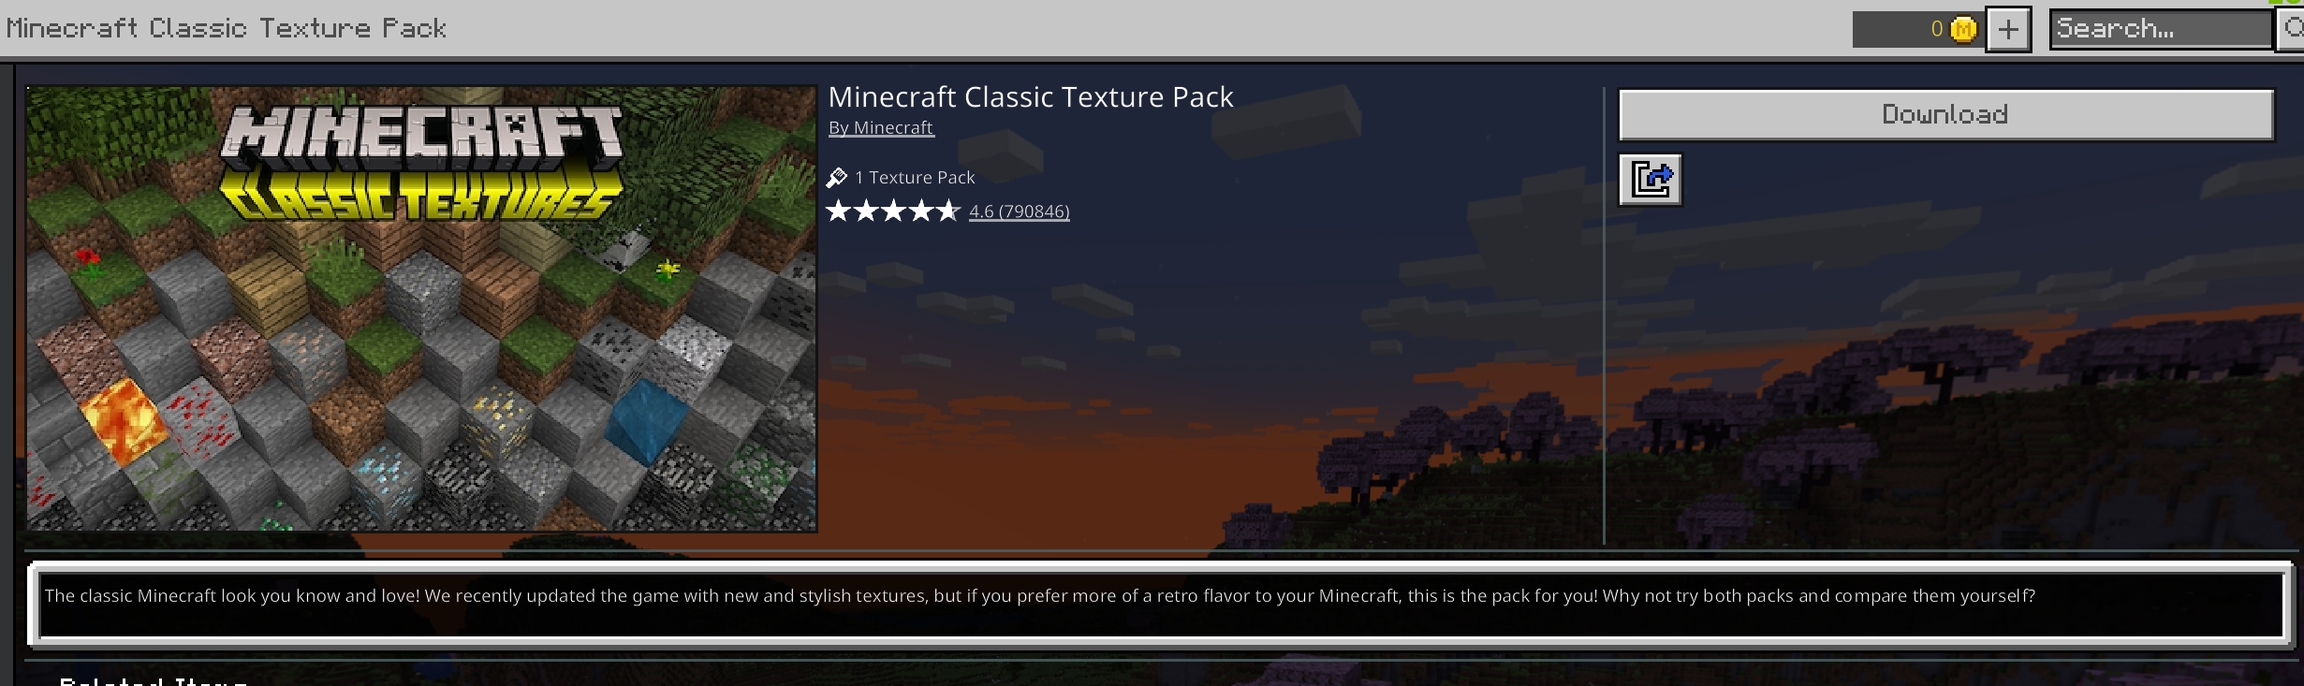
You need a specific free pack from the Marketplace called the "Minecraft Classic Texture Pack". It's free and made by Mojang.
If you previously used the "Minecraft Texture Update" pack — that one is no longer available. The Classic Texture Pack is now the correct one to use.
Step-by-step guide
Follow these steps carefully. They might seem like a lot, but each one is quick and simple.
Step 1: Get the free Classic Texture Pack
Open Minecraft on your console. Go to the Marketplace and search for "Minecraft Classic Texture Pack".
Download it — it's completely free and made by Mojang.
Step 2: Activate it in your world or Realm
- Singleplayer
- Realm
Open the world you want to use texture packs in. Go to the world's settings, then go to Resource Packs. Find the Minecraft Classic Texture Pack and activate it.
Go to your Realm's settings. Navigate to Resource Packs and activate the Minecraft Classic Texture Pack on your Realm.
You should see the pack show up under ACTIVE in the resource pack settings. Below it, under MY PACKS, you'll see your BedrockConnect packs.
- Singleplayer
- Realm
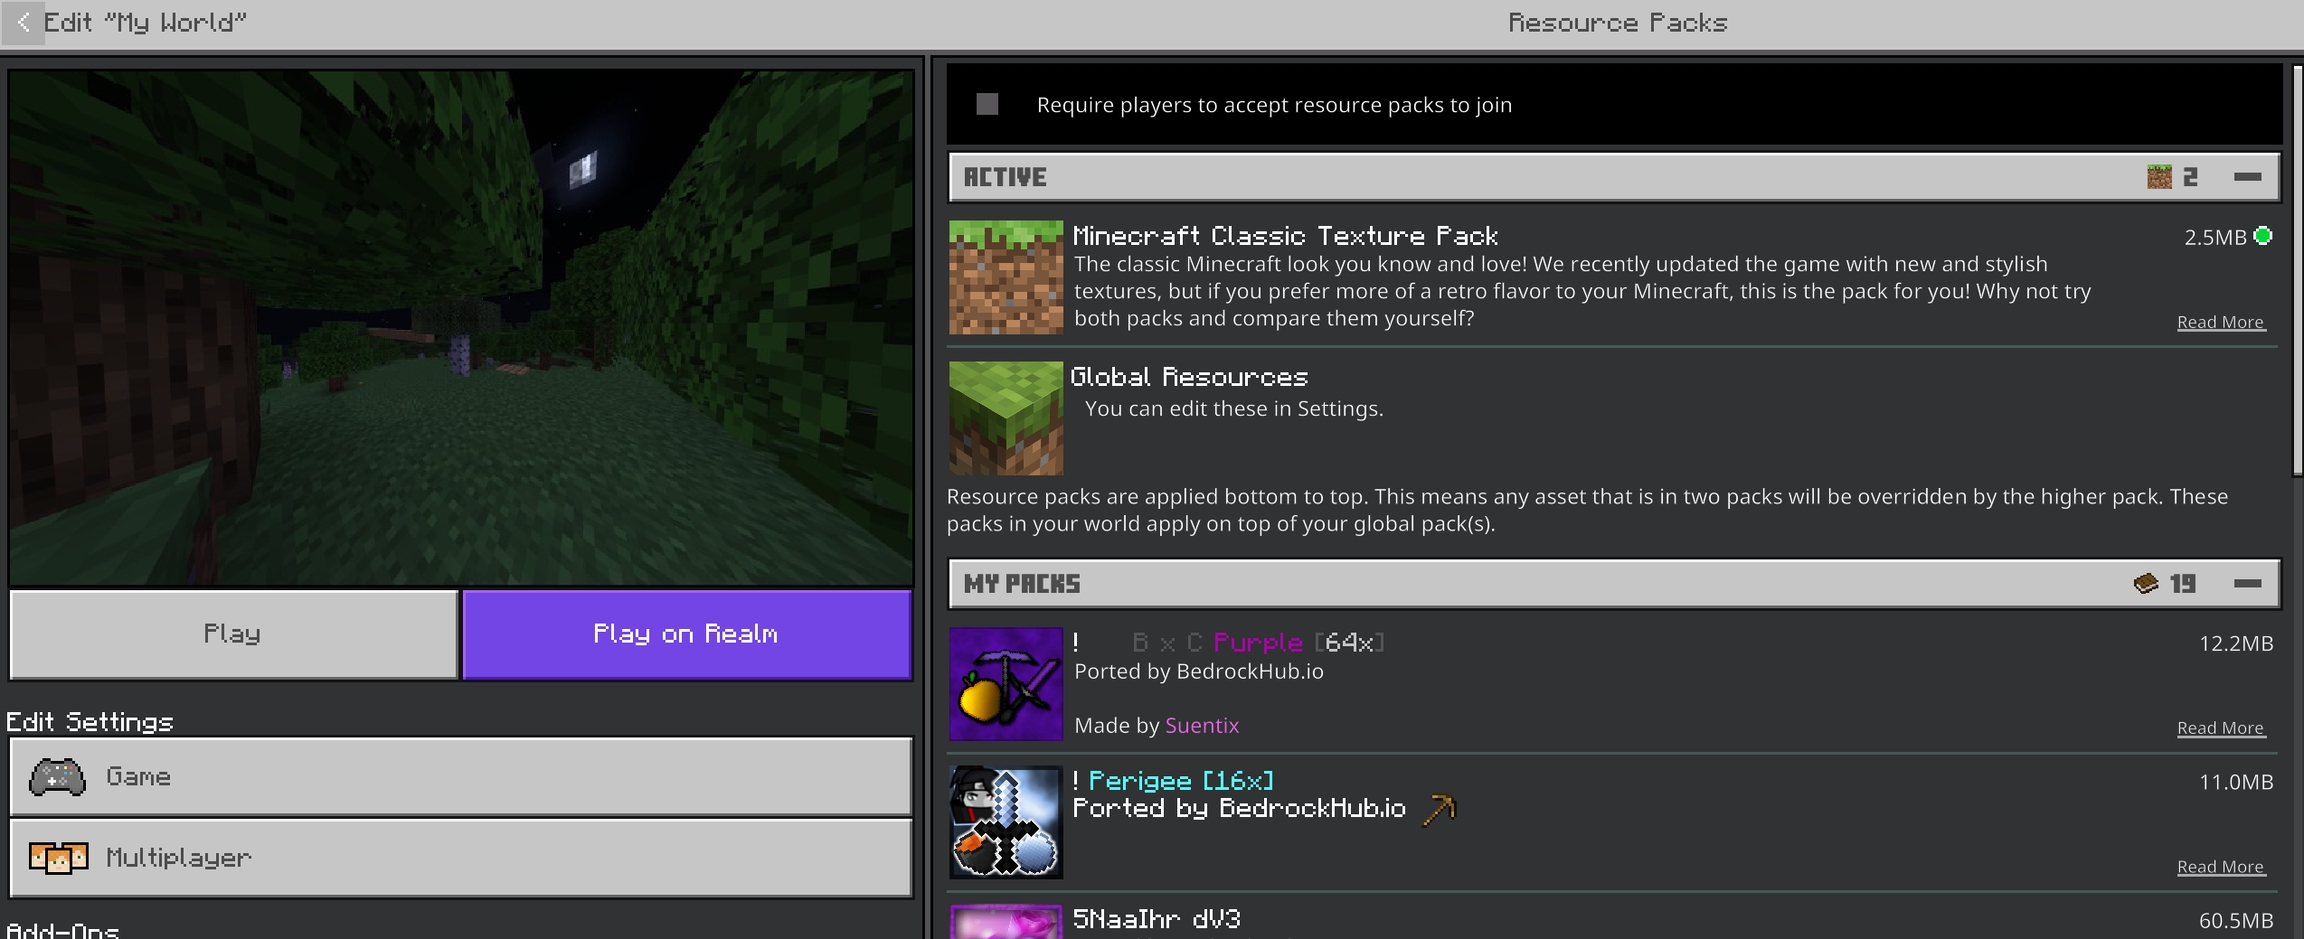
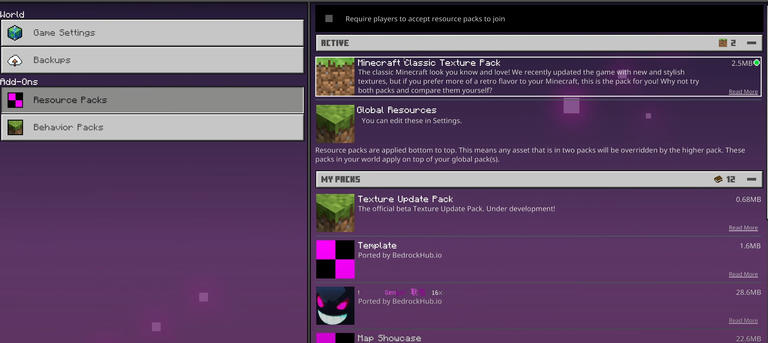
Your screen might look slightly different from these screenshots — the Marketplace UI changes over time. What matters is that the Classic Texture Pack shows up under ACTIVE in your world or Realm's resource pack settings.
Step 3: Delete it from Global Resources
This step is important — don't skip it!
- Go back to the Minecraft main menu
- Go to Settings → Global Resources
- Find the Minecraft Classic Texture Pack
- Activate it there
- Confirm when asked
- Now delete it
Yes, you activate it and then immediately delete it. This sounds weird, but it's necessary for the workaround to work.
Step 4: Set up your pack in BedrockConnect
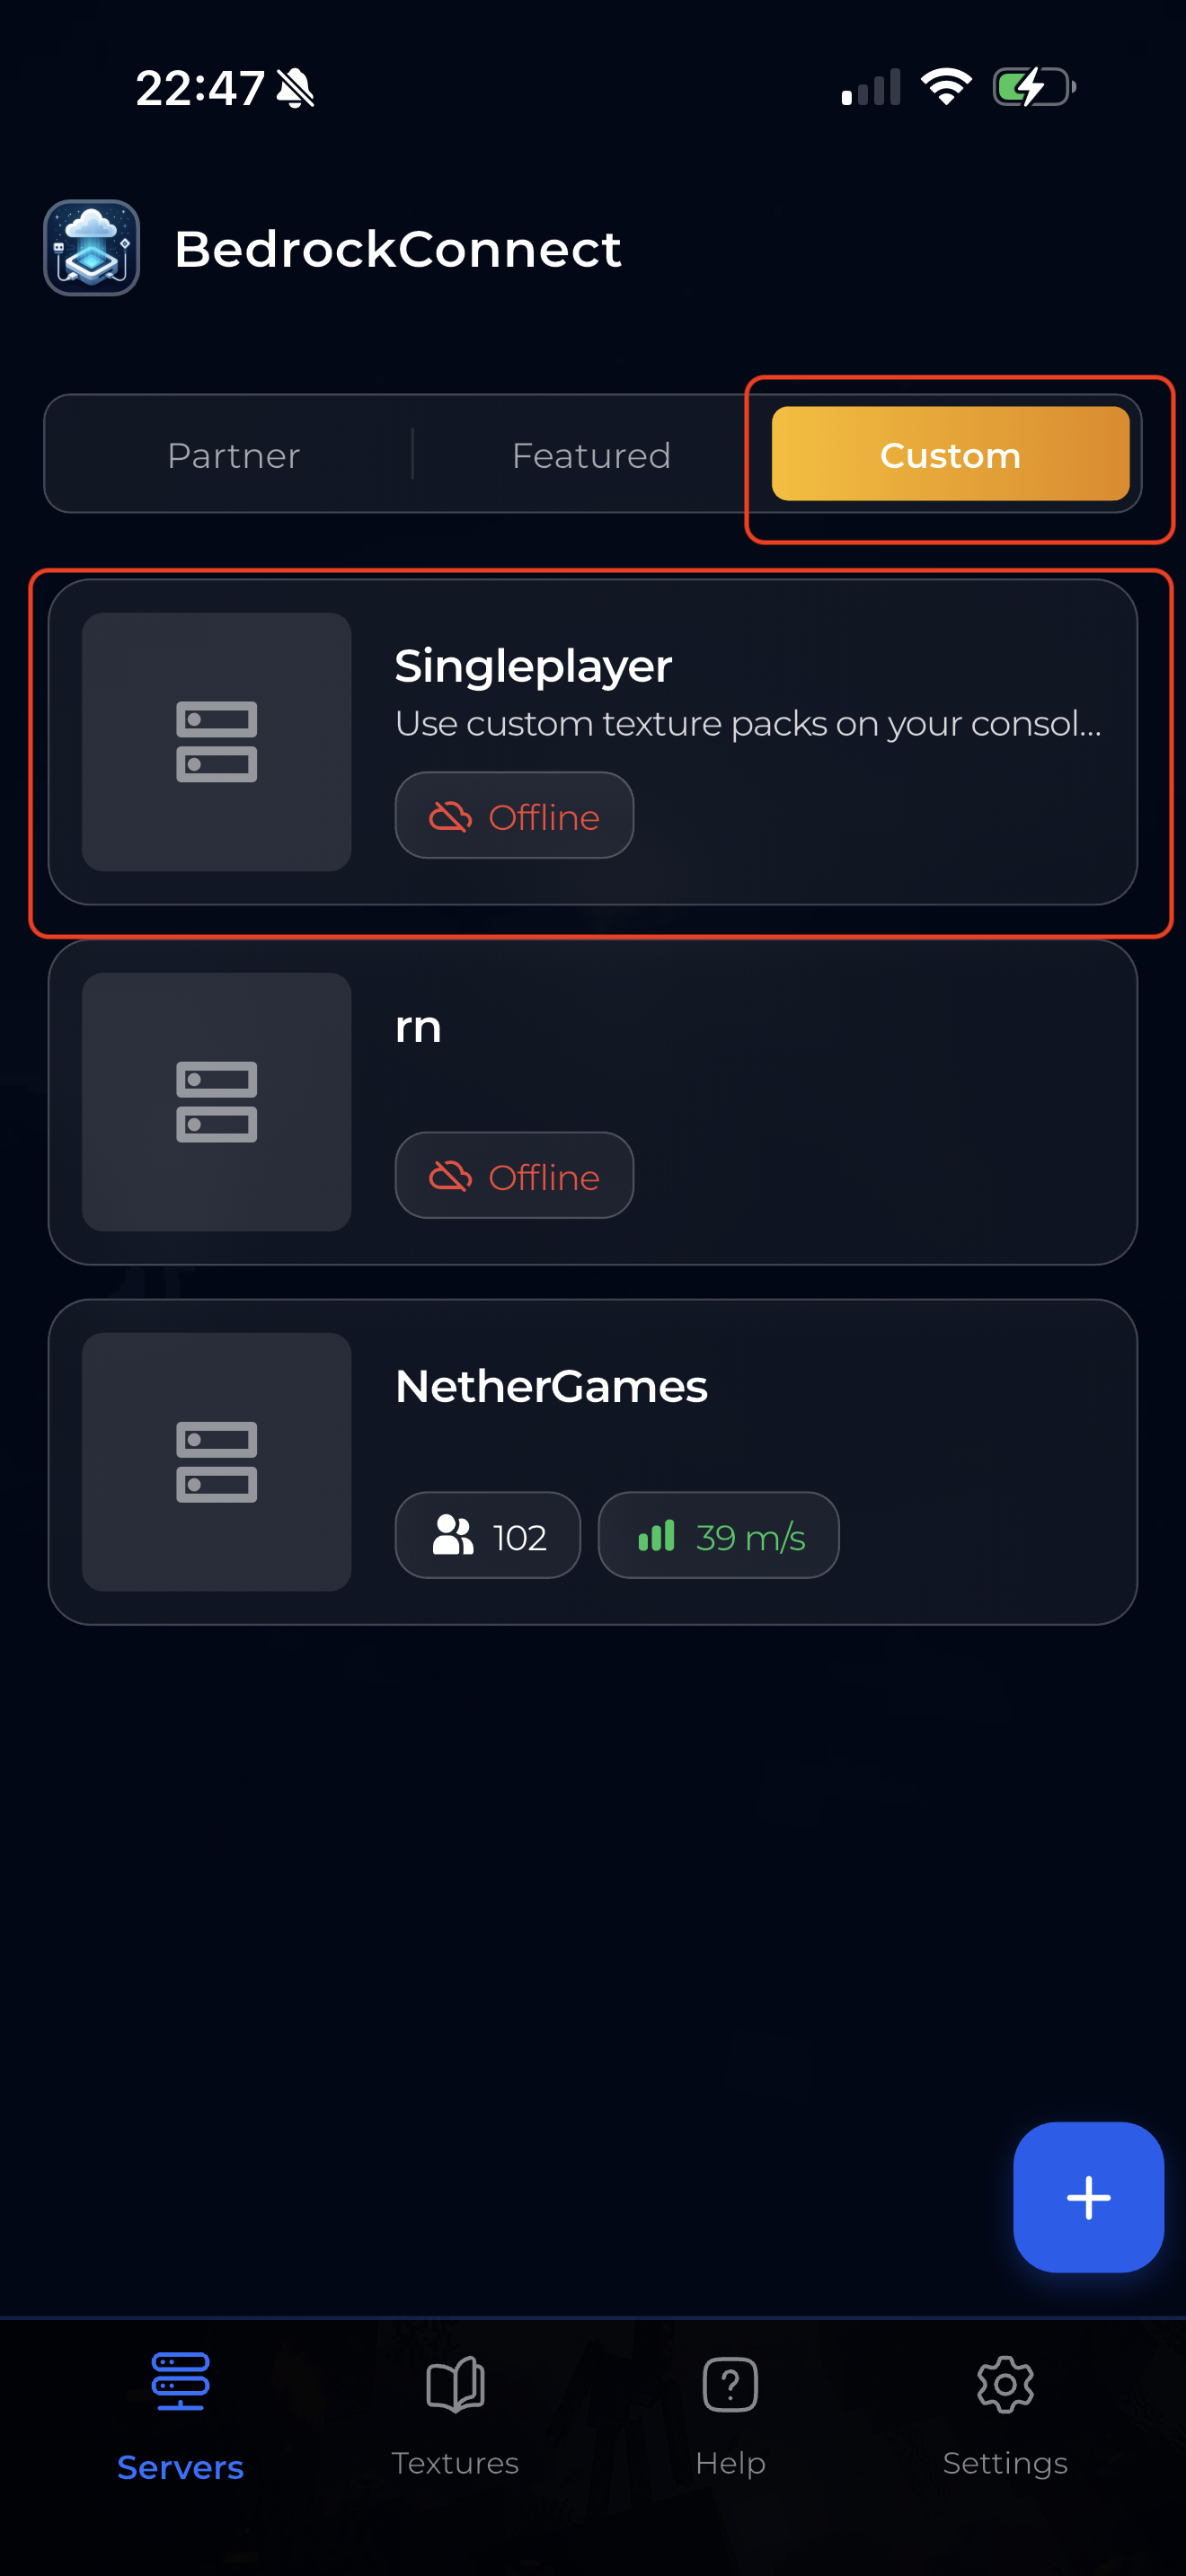
- Open the BedrockConnect app on your phone
- Go to the Textures tab
- Import the resource pack you actually want to use
- Select "Singleplayer" as the mode
You'll see a "Singleplayer" entry appear in your server list on the Custom tab. This is the local server you'll need to join later in step 6.
Step 5: Restart Minecraft completely
Close Minecraft completely on your console. Not just go to the home screen — actually close the game fully. Then reopen it.
This step is critical. If you don't fully restart Minecraft, the texture pack won't load properly.
Step 6: Join through BedrockConnect
- Open Minecraft on your console
- Go to the Friends tab
- You'll see a local server from BedrockConnect — join it
- It will ask you to download a pack — accept it
- You'll be connected to your singleplayer world or Realm
Step 7: Reload the world
Leave the world and join it again. This second load is when the texture pack fully activates. After this, your custom textures should be visible!
Console-specific notes
- PlayStation
- Xbox & Switch
On PlayStation, the setup works as described above. No extra steps needed.
To change to a different pack, repeat the process from step 3.
Every time you restart Minecraft on Xbox or Switch, you'll need to redo steps 3, 5, and 6. This means:
- Delete the Classic Texture Pack from Global Resources again
- Restart Minecraft
- Join the local server again to re-download the pack
This is a limitation of how Xbox and Switch handle resource packs — unfortunately there's no way around it.
Good to know
- Friends can join with different packs — if your friends also have BedrockConnect set up, each person can use their own texture pack in the same world
- Only texture packs work — shaders, modpacks, skin packs, and behavior packs are not supported
- Switching packs — to use a different texture pack, go back to step 3 and repeat the process with the new pack