Join a Server — Xbox, PlayStation & Nintendo Switch
This guide shows you how to connect your console to a custom Minecraft Bedrock server with the BedrockConnect app. It works the same way on every console, with an Android phone or an iPhone/iPad.
What you need
- A phone or tablet (Android or iOS) with the BedrockConnect app installed — version 4.0.88 or newer (update it in the App Store or Google Play)
- Your phone and console must be on the same Wi-Fi network
- An online membership for your console:
- Xbox
- PlayStation
- Nintendo Switch
Xbox Game Pass Essential or higher.
PlayStation Plus.
Nintendo Switch Online.
Do not use a VPN, mobile data, a guest network, or a strict firewall. Your phone and console need to talk to each other directly over your Wi-Fi. 2.4 GHz and 5 GHz both work, as long as both devices are on the same home network.
You don't need to change any DNS settings on your console — not even on the Nintendo Switch. Your console simply finds BedrockConnect as a LAN world.
Step-by-step
1. Open the app
Launch BedrockConnect, tap Get Started and go through the welcome screens: Same WiFi Network, Online Play and Find Your Server. After that, the app asks for your age (Age Verification) and may ask about ads and notifications (Stay Updated — you can tap Maybe Later).
- iPhone / iPad
- Android
During the welcome screens, the app shows an "Allow Local Network" step. Tap Allow Access, then tap OK in the popup from iOS. Without this, BedrockConnect can't reach your console.
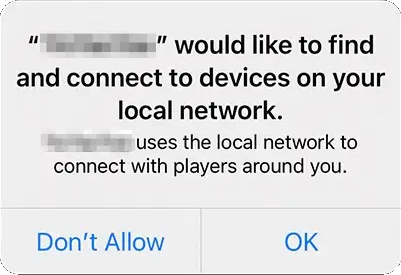
In BedrockConnect, open the Settings tab → Community & Support → Local Network permission. This opens the iPhone settings for BedrockConnect — turn on Local Network. Then restart the app.
If you see "Local network access needed" when you start a server, it's the same problem: tap Open Settings and turn Local Network on.
Android doesn't need a Local Network permission — nothing extra to allow, you're ready to go.
2. Pick or add a server
In the Servers tab you can pick a server from the Partner or Featured list, or add your own.
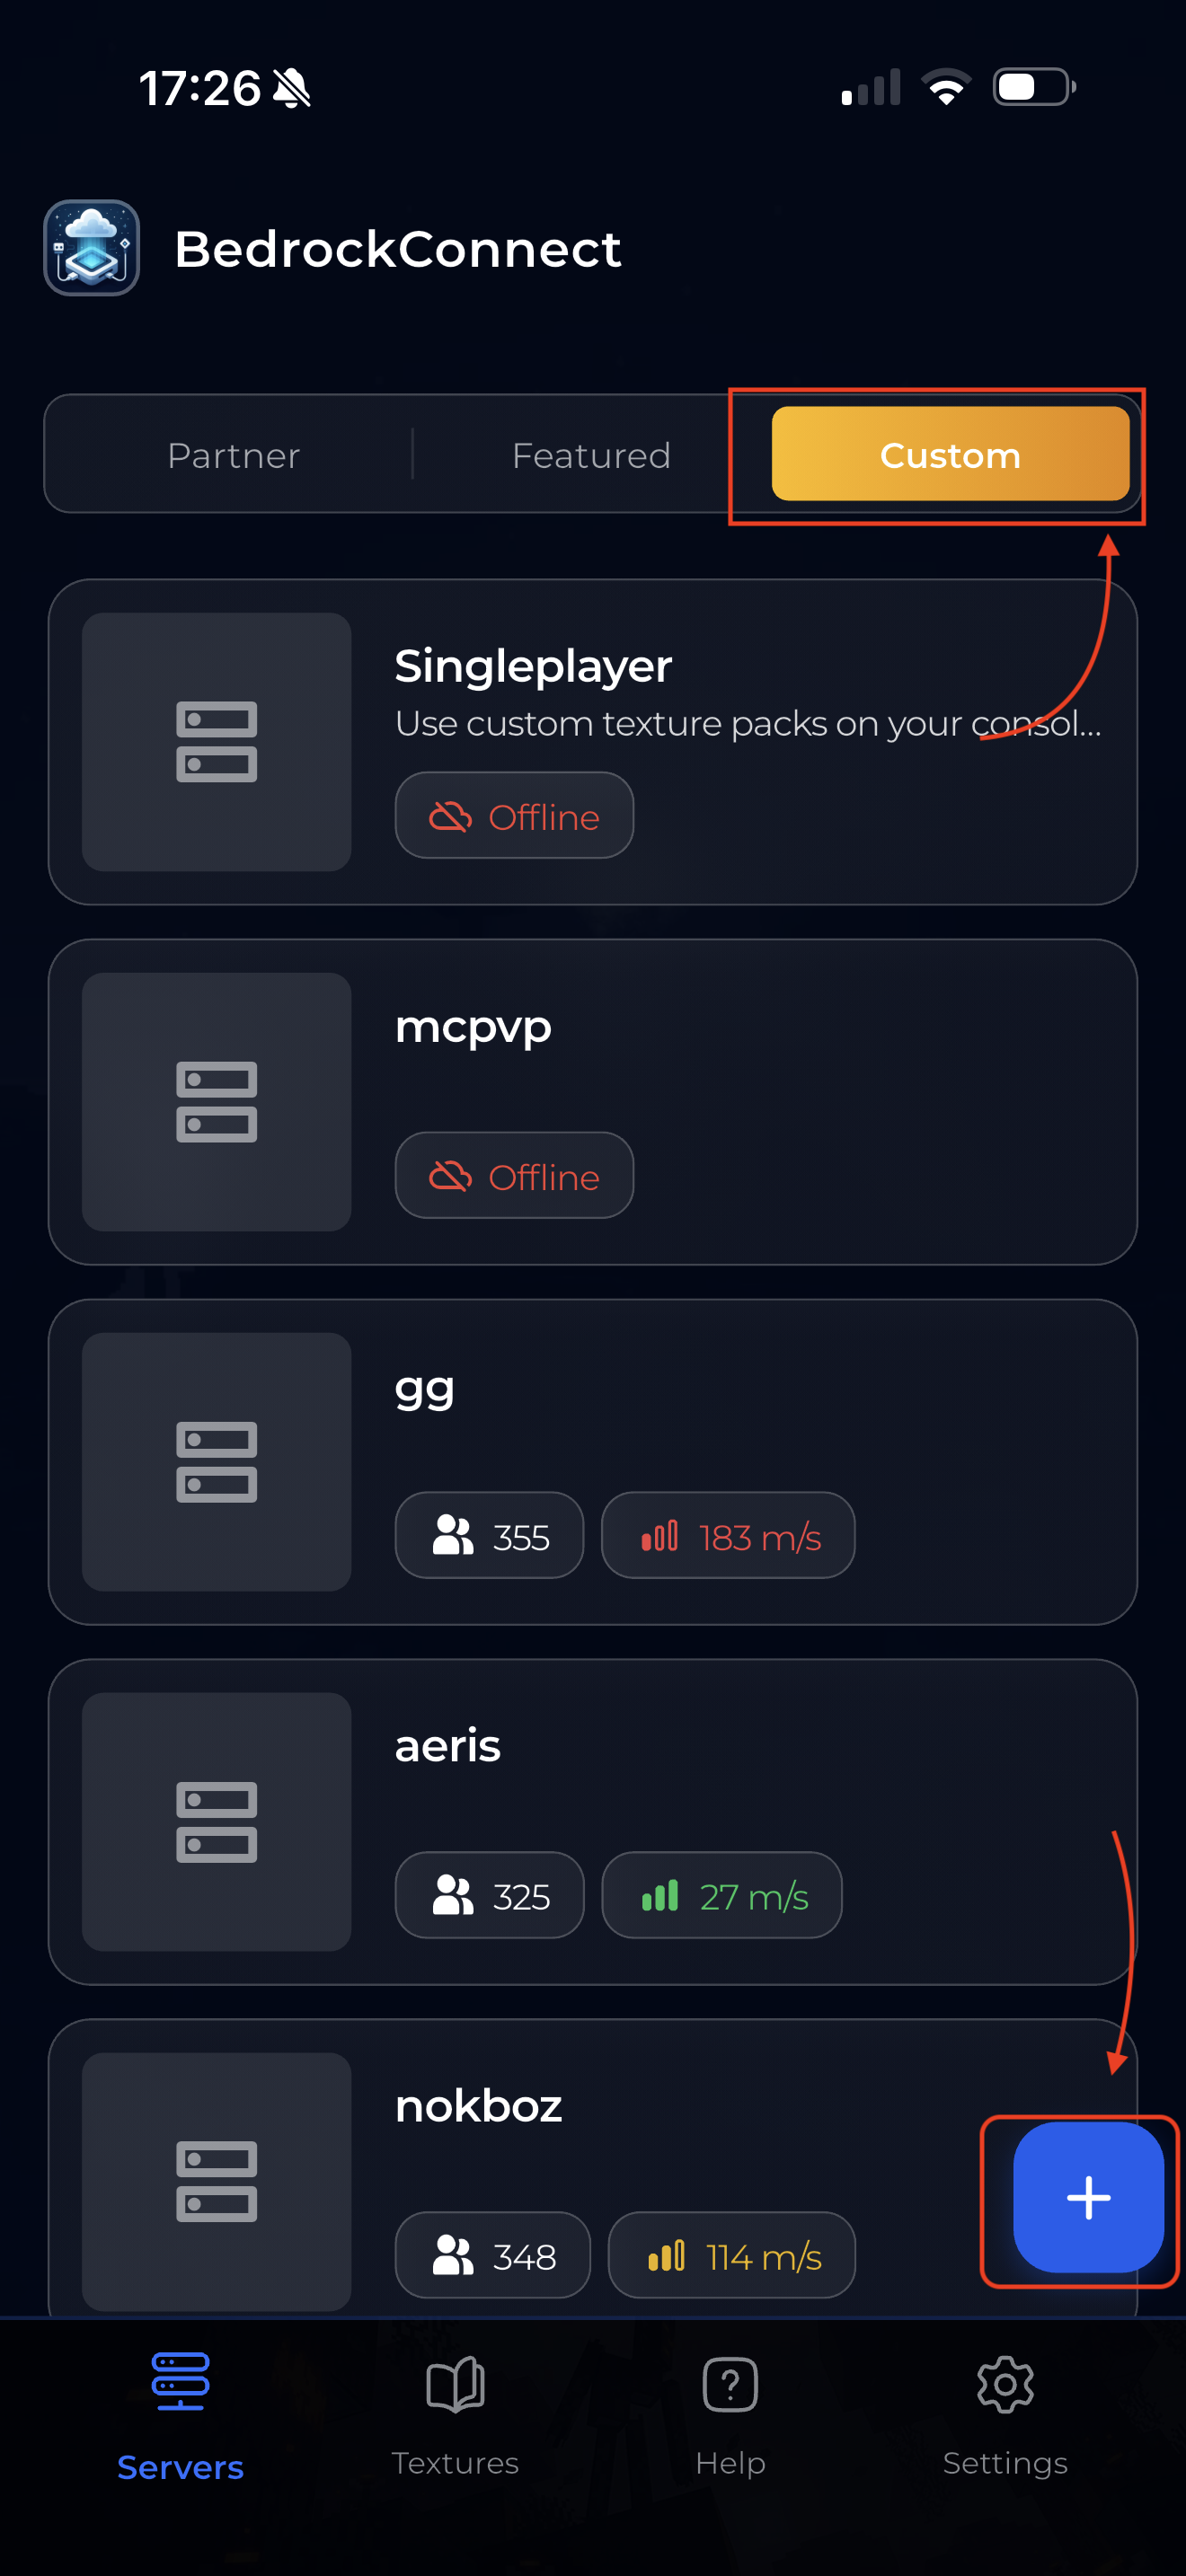
To add your own, tap the "Custom" tab at the top, then tap the blue + button in the bottom right. You'll land on the Add Custom Server screen.
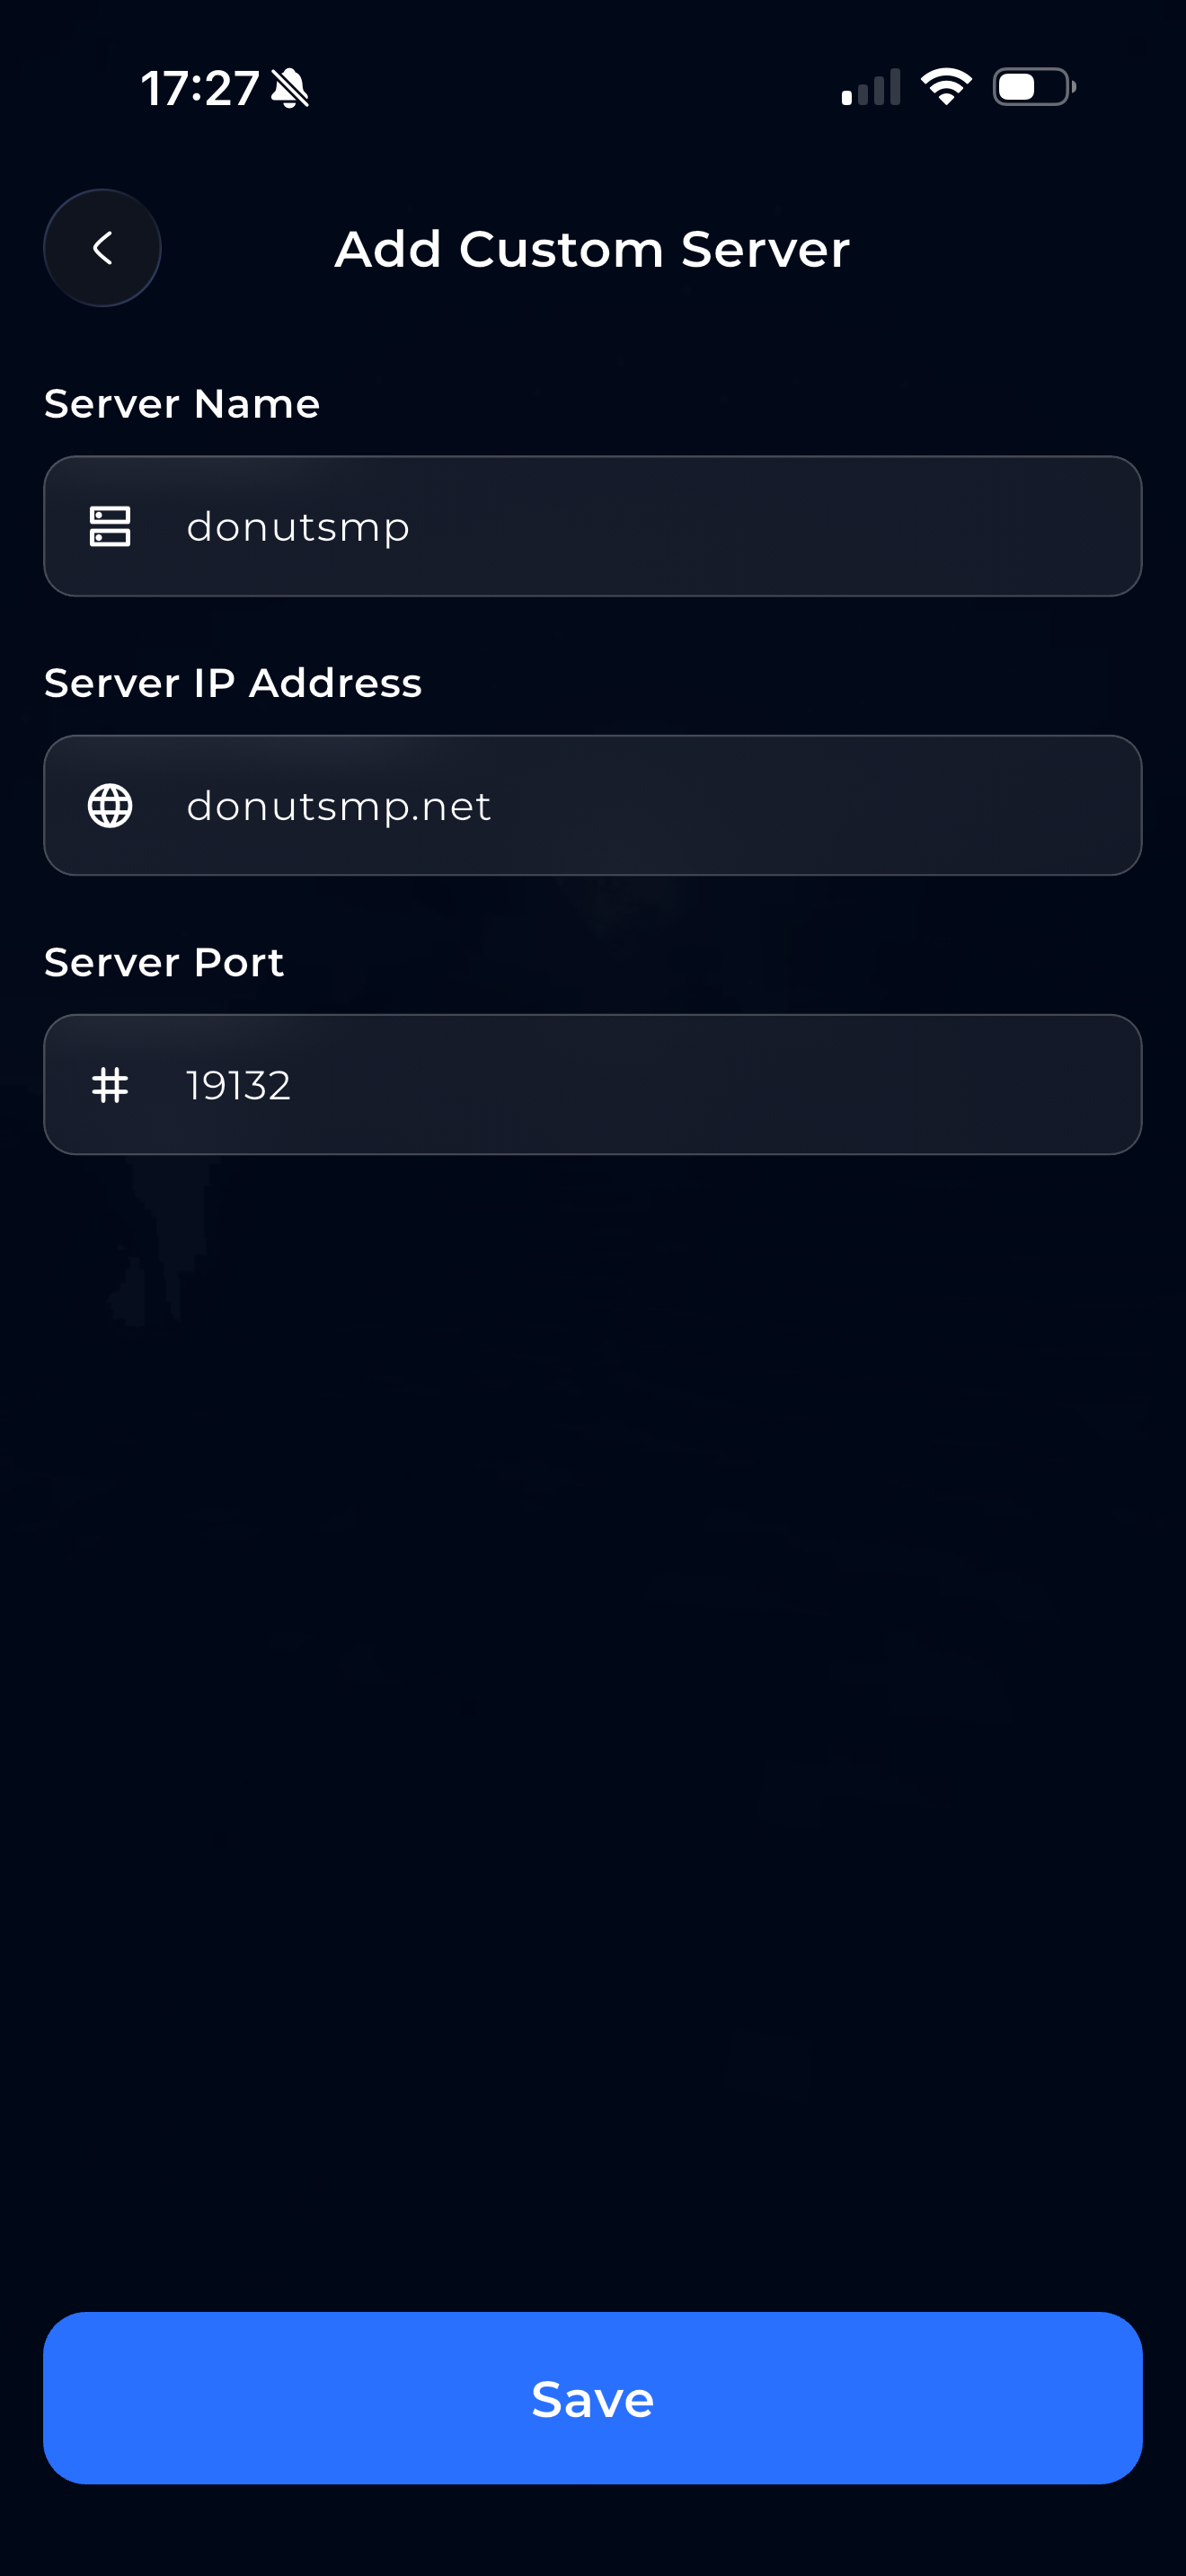
Enter the Server Name, Server IP Address (a domain like play.example.com or an IPv4 address) and Server Port (usually 19132), then tap Save. The server must be online and running Minecraft Bedrock Edition.
Without Premium you can add up to 3 custom servers. Your custom servers are saved only on your phone — if you delete the app, they're gone.
If you see this message, the server is already in the Partner or Featured list. Just pick it from there instead.
3. Check the status
Every server in the list shows a small status:
| Status | What it means |
|---|---|
| Checking… | The app is still asking the server. Wait a moment. |
| A people icon and a number, like 12 | The server is online — the number shows how many players are on it. |
| Offline | The server didn't answer. It might be down, or it doesn't support how consoles join today. |
| Status unavailable | The app couldn't ask the server — for example the address is wrong or your internet has a problem. |
The status updates about every 15 seconds. You can still start a server that shows Offline — but if it stays offline, joining usually won't work.
4. Select and start
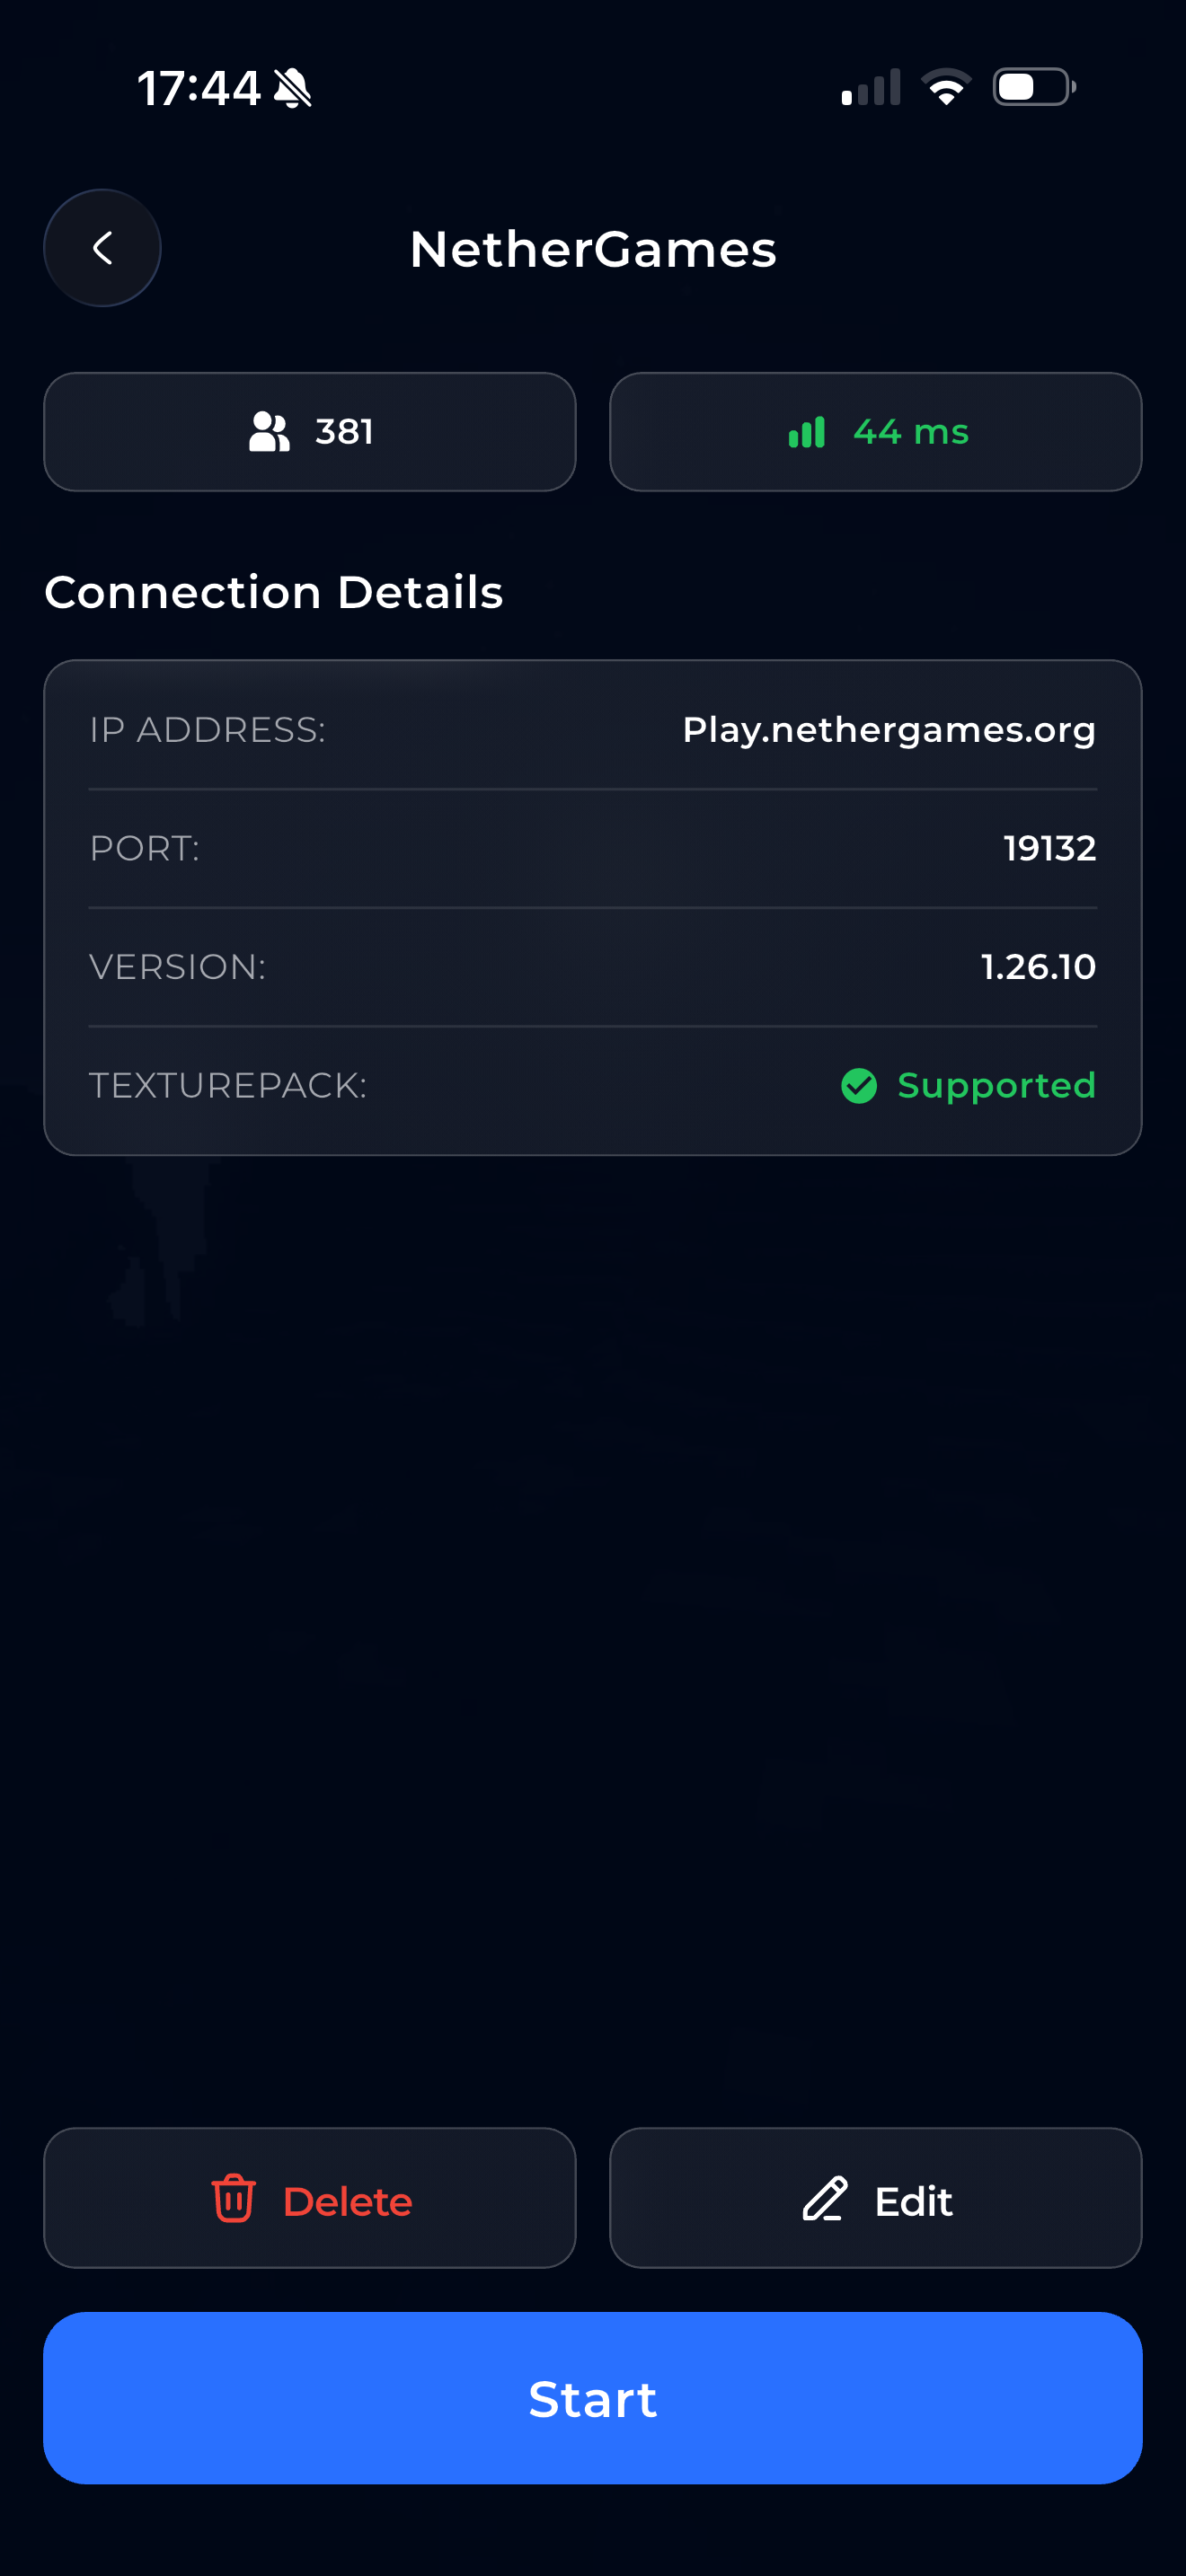
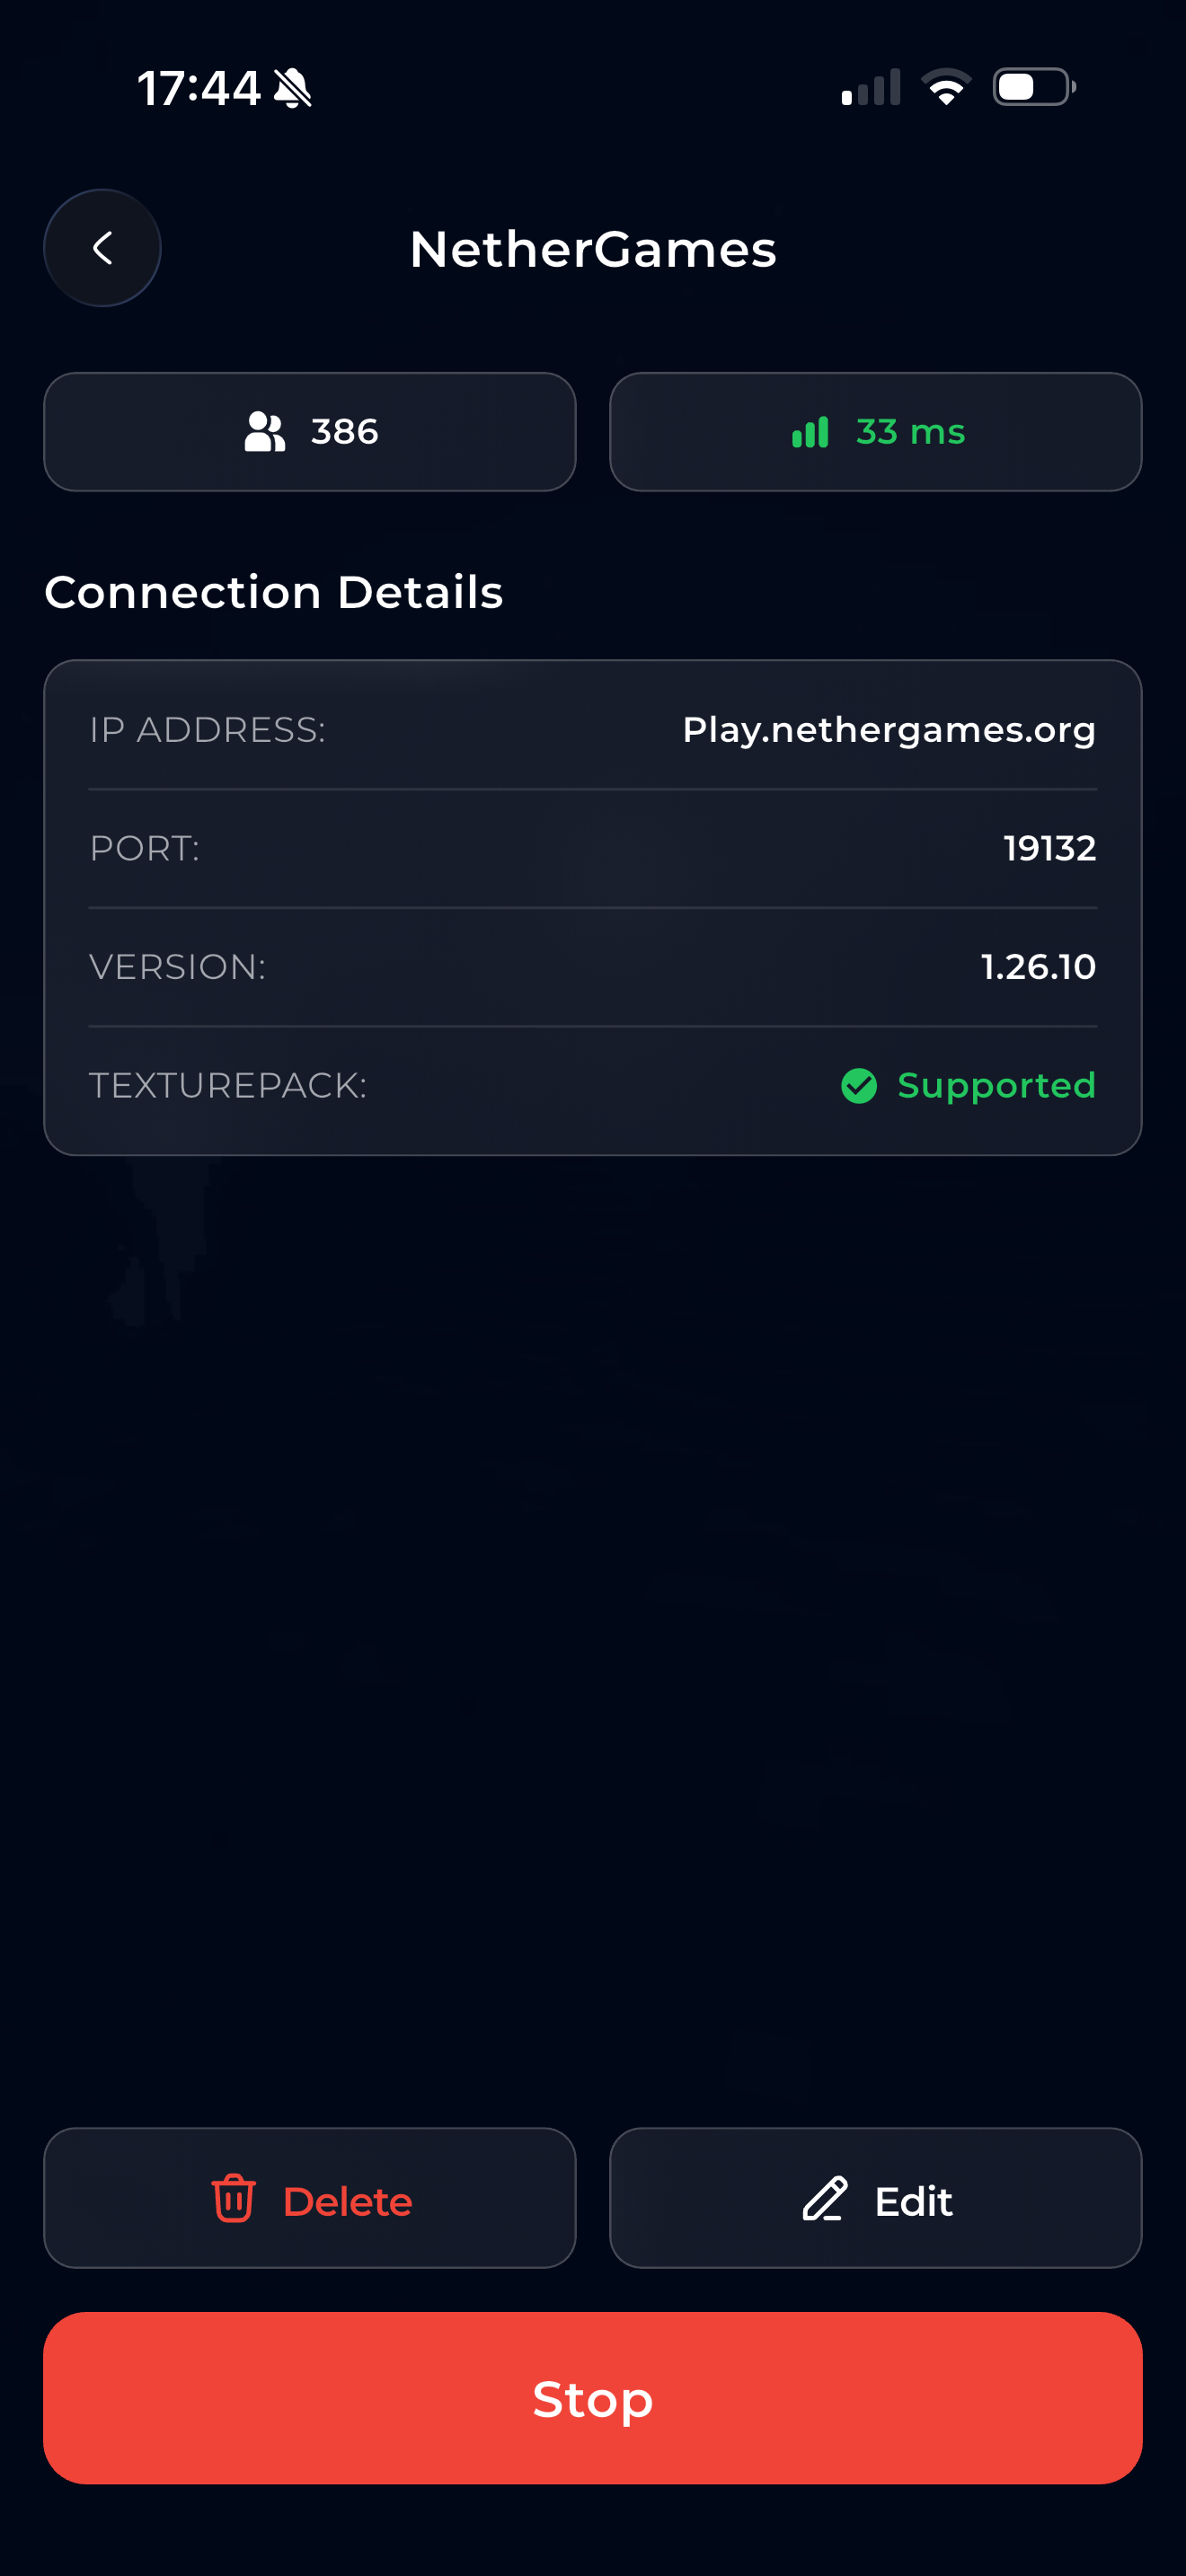
Tap the server. You'll see the server details.
Some Partner and Featured servers have more than one game mode — pick the one you want now, because you can't change it while the server is running. See Game Modes.
Then tap the blue "Start" button at the bottom.
Without Premium, the button often says "Ad & Start" — you'll watch a short ad first, then the server starts automatically. Free users may also see an ad when a player first joins the running server. With Premium, there are no ads at all.
While it starts, the button shows what the app is doing: Starting..., Preparing texture packs..., Loading protocol... and Connecting to server.... Once the server is running, the button turns red and shows "Stop".
You can only run one server at a time. Other servers then show "Another server is starting..." or "… is running".
5. Find the server on your console
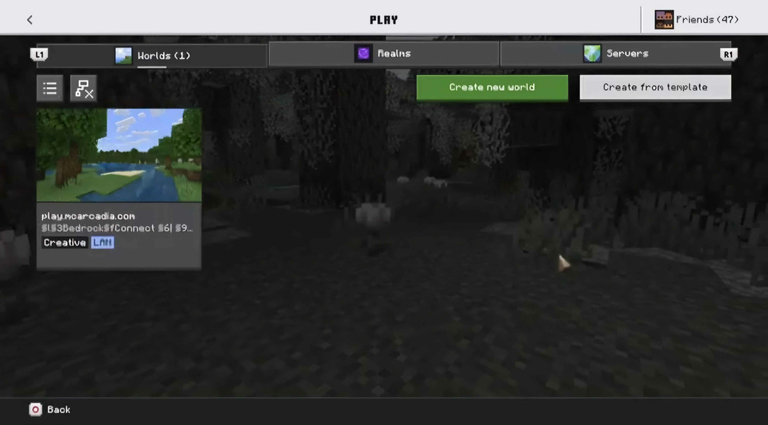
On your console, open Minecraft and go to the Worlds tab (on some versions it's called the Friends tab). BedrockConnect shows up there as a LAN world. Tap it to join.
The app tells you this too in the Where to Find the Server popup: "The server appears as a LAN World in your Minecraft Worlds tab." Tap Don't show again if you don't need the reminder.
Check our Troubleshooting Guide.
6. Join
Your console first connects to BedrockConnect, then gets sent on to the real server. This is normal — you're connecting through two servers.
When your console joins, the app shows "Keep the app open until you're in the world". Leave BedrockConnect open on your phone until you're standing in the server's world. If you leave the app or lock your phone too early, the server stops and your console can't get in.
Once you're in the server's world, you can close the app. BedrockConnect isn't a proxy — your game goes straight from your console to the server.
- Free: the server in the app stops by itself shortly after you joined (after 2 minutes at the latest). To join again, start it again.
- Premium: the server keeps running while the app stays open. It stops when you tap Stop or leave the app. Players who are already in the server's world stay connected either way.
Connection helper
Some servers are set up in a way that makes consoles give up while joining (you might see errors like Terracotta or Door). The Connection helper fixes many of these: your phone passes on the short "hello" between your console and the server, and then the game runs directly between them.
It's in the Settings tab and it's on by default. Keep it on unless support asks you to turn it off. → Learn more about the Connection helper